FAQ for import CSVs into Shopify using “PH CSV Import, CSV Export app”
This is for the app Shopify Import and Export CSV. Besides this FAQ, you are probably going to eventually read through these other two posts: 1) troubleshooting guide for common errors, 2) CSV column documentation that documents what each CSV column means.
If you want more example CSV files, I have lots more I use to test the app with. Just send me an email hello@programmerhat.com
What do each of the column names mean in a CSV file for creating/updating products?
Please read our official documentation for each column in a CSV file for creating/updating products.
What is this error the app shows??
Please read out troubleshooting guide for common errors.
What information to give support for help in importing CSV files?
Support needs two things:
- Your CSV file itself (because we do not store the CSV files on the server).
- “Settings of the App” — which includes the “from” and “to” columns of the CSV file.
For number 2, look right next to the Import button in Step 5. Clicking on “Export Settings of this App” will download a JSON file onto your computer. Send this file to support.

An easy way to use the CSV app to do updates on products
Do an export of all the products in the CSV app. Then delete all rows except for the products you want to update.
Then you can update the CSV, and use the “Import” function in the app.
Example CSV file to import and create products
This creates 3 products: “Example Hat”, “Example Pants”, “Example T-Shirt”.
This also creates 3 variations on “Example T-Shirt”, so this examples teaches you how the variations work in Shopify.
https://ecomapps.programmerhat.com/csv-import/csv/regression_blank_gids.csv
First method for how to update inventory numbers in Shopify: using SKU
This is the preferred method for updating inventory numbers. Because the 2nd method requires you to update ALL the variants in a product, whereas this 1st method allows you to update only specific variants in a product (the app finds the variants using SKUs).
Here is a example CSV file.
https://ecomapps.programmerhat.com/csv-import/csv/update_inventory_using_sku.csv
It’s a very simple CSV file. There are only two columns you need: 1) SKU, 2) Variant Inventory Qty. The 3rd column, “Location”, is not necessary if you have only one location (the app will auto-select that location for you).
Here is a tutorial video on how to use the example CSV file.
Second method for how to update inventory numbers in Shopify: updating the variants that a product has
This second method is not as ideal as the first method described in the previous section, because it requires replacing ALL the variants in a product with new inventory numbers, instead of being able to update only certain variants (using the SKU to specify the variant).
As such, look at this example CSV file. You need to use the “Handle” field to identify a product. This will replace the existing variants with new variants, hence updating the inventory numbers as a result.
The two important column names are “Variant Inventory Tracker” and “Variant Inventory Qty”. You will see in the example CSV that “Variant Inventory Tracker” should have all “shopify”, and the “Variant Inventory Qty” should be a number.
https://ecomapps.programmerhat.com/csv-import/csv/regressioninventory.csv
What is a Option Name and Option Value?
This is a critical concept for understanding variants. Shopify uniquely identifies variants of a product based on Option Name and Option Value.
Here is a screenshot of variants as an example:
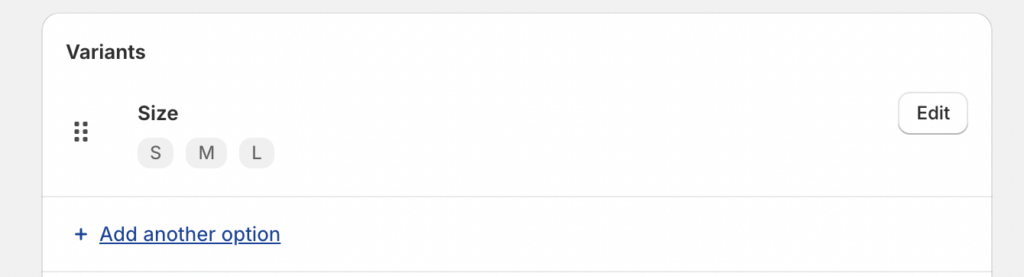
The Option Name is “Size”, and the possible Option Values are S, M, L.
So for variants of a product, the Option Values must be different between the variants. For example here: one variant has Size “S”, another variant has Size “M”, another variant has Size “L”.
Now in your CSV, variants cannot have duplicate values for the same variant.
Hope that clears it up. If not, please email me asking me to explain this better.