


Edit Multiple Lines in Vim
Introduction
Editing multiple lines together is a cool feature first introduced in the Sublime Text Editor version 21 back in 2014. Since then, a lot of modern IDEs and Text Editors have incorporated it. Meanwhile, Vim is an old-gold, having way older footprints than that of Sublime’s first release in 2008. Why does Vim then not include multi-cursor editing as a native feature, while still being miles away from any other editor in terms of text manipulation?
The best answer I could give you is that you don’t really need multiple cursor editing in Vim. Why? Because it has enough similar features that’ll get the same job done, without any multi-cursor manliness. Meh? It ain’t a manly thing at all!
Nevertheless, if you’re still stubborn enough to want the real multiple cursor editing in Vim, you can breathe peace as Vim plugins have got you covered!
Without using Plugins
Using Visual Block
One of the most common scenarios where you may want to use multiple cursors is in front of several lines and/or code stuff that are aligned in the same vertical position and insert the same text across all those lines. If I’m not wrong, It should look something like:
For such schemes, Vim’s Visual Block Mode has just the thing you need. First, enter Visual block mode by pressing Ctrl + v and then vertically select the spaces in front of the specified line positions you want. Then, press shift + i (which will give you capital i), and you’ll see that your cursor is positioned on the first line of selection. Don’t meh just yet. Now type the text you want to insert across all the previously selected lines on the current one, and one done press the Esc key on your keyboard to come out of Insert Mode.
Wala! Can’t believe your eyes yet? Well, you should, because you just inserted the same text across several vertically aligned lines, without actually needing a multi-cursor editing function, in Vim!
Using Macros
This one’s a neat trick. A very neat one indeed. This helps you in case your target lines don’t align in a straight, vertical positioning. You don’t get instant insertion once you edit a single line like the previous one while using this method, and it could also be a little more inconvenient as compared to real multi-cursor editing, but if you practice it enough you’ll be editing multiple lines like any other without even needing the function itself. But how do you do this? Hear me up close.
You’ll need some basic understanding of macros in Vim first, so check out other tutorials if you need to before trying this one out.
- First, position your cursor to the first line and/or column you want to edit, and append the text you usually would.
- Now, press “qa” in Normal Mode to start recording a macro to “a”, while your cursor is still in the same position. Afterwards, search for the next instance of the text before which you’d like to append the string by typing:
/[string]- Press i to enter insert mode and append the desired string. Once done, press Esc on your keyboard to leave Insert Mode.
- Press q to stop recording the macro.
Lastly, type “@a” on your keyboard to play the macro. You’ll see that the next target will automatically receive the amendment you did on the previous instance. To fire this on several targets, type any number and then press “@a”, for example, “20@a”.
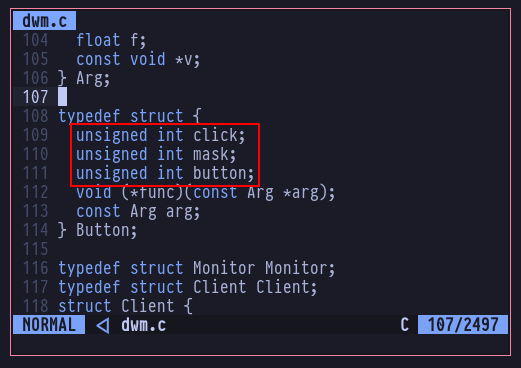
I know, I know, I know! A lot of you are quite confused with the explanation. Which is why, the gif media format comes in quite handy. The following should make it easier for you to understand the whole process:
If you notice closely, you should be able to understand the process. Firstly, I inserted the text on the first instance. This wouldn’t affect the rest of the process, it is just to help be append text for the first one anyway. Next up, I created a macro which searches for a string “button“, jumps to it’s next occurrence, appends “my” to the string and quits Normal Mode. Then I stopped recording the macro, after which I was able to replay the macro and append “my” on several instances of “buttons” however I wished.
This could go over your head the first time you see it, but if you try it a few times yourself you’ll know how efficient this method could get!
Using the g command
You should already be familiar with the power the g command has in Vim. It is one of the most prominent features the editor has to offer. You can pair this command with a macro to edit append text on multiple lines at once. Let’s learn how.
- First, place your cursor in a free position, and press qa to start recording a macro. Then, type the text you want to append.
- Press Esc to return to Normal Mode.
- Press q again to stop recording the macro.
- Now, use the following syntax to append the text on the desired beginnings of the target lines:
:g/[pattern]/normal @a
You can also pair more complex types off macros that give you move control over the type of amendment you do. But this should hopefully give you a basic idea of the usage.
Comment Multiple Lines
One of the common uses of the g command is to comment multiple lines at once. This is a purely efficient way of commenting multiple lines together in Vim which you may not find elsewhere!
This one also requires recording a macro, but trust me, it’s worth it! You could already tell how well macros and the g command pairs to do some exceptionally cool stuff in Vim. Anyways, let us get into the steps:
- Start recording the macro using qa and then insert the the comment character specific to the language.
- Stop recording the macro using q.
- Now use the g command once again to apply the commenting on the lines that match your pattern:
:g/[pattern]/normal @a
pretty cool, huh?
By using Plugins
I won’t need to go into much depth about this one as the plugin documentation already explains the procedure well enough. But for the sake of it, I’ll show you how to get the true multi-cursor editing in Vim with the popular plugin called vim-visual-multi. It is the closest you could get for Vim as of now. First, visit the GitHub link to install it using your plugin manager of choice. Or if you’re using Vim 8 and above, use the following command in your terminal:
$ mkdir -p ~/.vim/pack/plugins/start && git clone https://github.com/mg979/vim-visual-multi ~/.vim/pack/plugins/start/vim-visual-multiOnce installed, you can now use multiple cursors in several different ways. Refer to the plugin’s help text by typing “:help visual-multi” in Vim to know more. Here I’ll only the main feature for which you’dd want to use this plugin, that is, to actually edit multiple lines at different column positions in real time. Place you cursor in front of the first target and press Ctrl + n to mark it, and then place it before the next target and again press Ctrl + n, and so on. Once selected, press i to insert the text before the marked targets. This is pretty much how you do it:
Don’t worry about the red trails. They go away if you press Esc twice and a message will also show up on the bottom saying “Exited Visual-Multi”. That is pretty much it. If you want to know about all the features, refer to the documentation in Vim, or the GitHub page with the following link:
https://github.com/mg979/vim-visual-multi
Conclusion
If you have following closely throughout the article, you should now be able to carry out Multi-cursor editing in Vim. Most Vim power users would prefer not to use a plugin for the task. As habituating to the manual methods will give you an edge when you don’t have access to the plugins in a remote environment, or let’s say, it simply doesn’t seem to be very pro-ish to do so using a plugin. Nevertheless, if the true multi-cursor-editing is your way to go, simply use the plugin, however you wish!